Showing posts with label crafts. Show all posts

7.27.2010

thank you!

A salty oat cookie (!) made by the lovely Beth Hempton.

Everything's packed, the movers have come and gone, and we're currently camping out on the floor of our Austin house, getting ready for our drive to DC, which starts early tomorrow morning.

I grew up in New England, so I'm excited to live on the East Coast again for the first time in eight years, but there will definitely be things I'll miss about Texas (including our friends, queso, and the melt-in-your-mouth fresh tortillas from H-E-B). However, one of the things that I will miss most is the Austin crafting community. I've met an incredibly inspiring and supportive group of women here in town, and I'm sad to say good-bye. And so, I'd like to say thank you to everyone who's helped me along the way, answered my crafty business questions, taught me new skills, cheered me on, and made me feel so welcome. 

Thank you to the gals of EtsyAustin. Though I joined this enthusiastic and active street team only weeks before finding out we were moving, I've had so much fun meeting members, attending events, and learning more about running a craft business in Austin.

Thank you to Jennifer Perkins of Naughty Secretary Club, who took me on as an intern, let me help her make lots of cool crafts, passed along oodles of business advice, and shared books and supplies. I had so much fun working behind the scenes at NSC and learned so much about the day-to-day operations of a small craft business.

Thank you to all of my teachers at The Stitch Lab (such an amazing space and resource for crafters!), including Kat McTee and Rachel Hobson who taught me so much about embroidery and challenged me to try out new stitches and techniques.

And finally, thank you to the amazing women behind The WonderCraft (especially Beth H. who made the uh-mazing piece pictured above and wrote the sweetest blog post to go along with it), who have been so supportive of Salty Oat, dispensed great advice, and carried my items in their boutique. I had a blast interning for them (and using their button machine!) and will miss them dearly. (For those of you lucky enough to still be in Austin, I highly recommend you go visit them this weekend at their new location in East Austin!)

I've scheduled a recent craft project post (the first in a while!) to appear on Thursday (we'll be driving somewhere through Tennessee), and when I come back on Tuesday, I'll be blogging from our new apartment in Silver Spring---while hopefully surrounded by our recently delivered furniture. Until then...

4.15.2010

wedding project: boutonnieres

First of all, thank you to Rachel for featuring my wedding quilt on the Craft blog on Tuesday! I'm so flattered! Also, thank you to everyone for their lovely comments, and welcome new followers!

Since a lot of the projects that I've been working on and photographing this week are for swaps (and I don't want to spoil the surprise for my swap partners!), I thought that I'd share another wedding-related craft project with you.


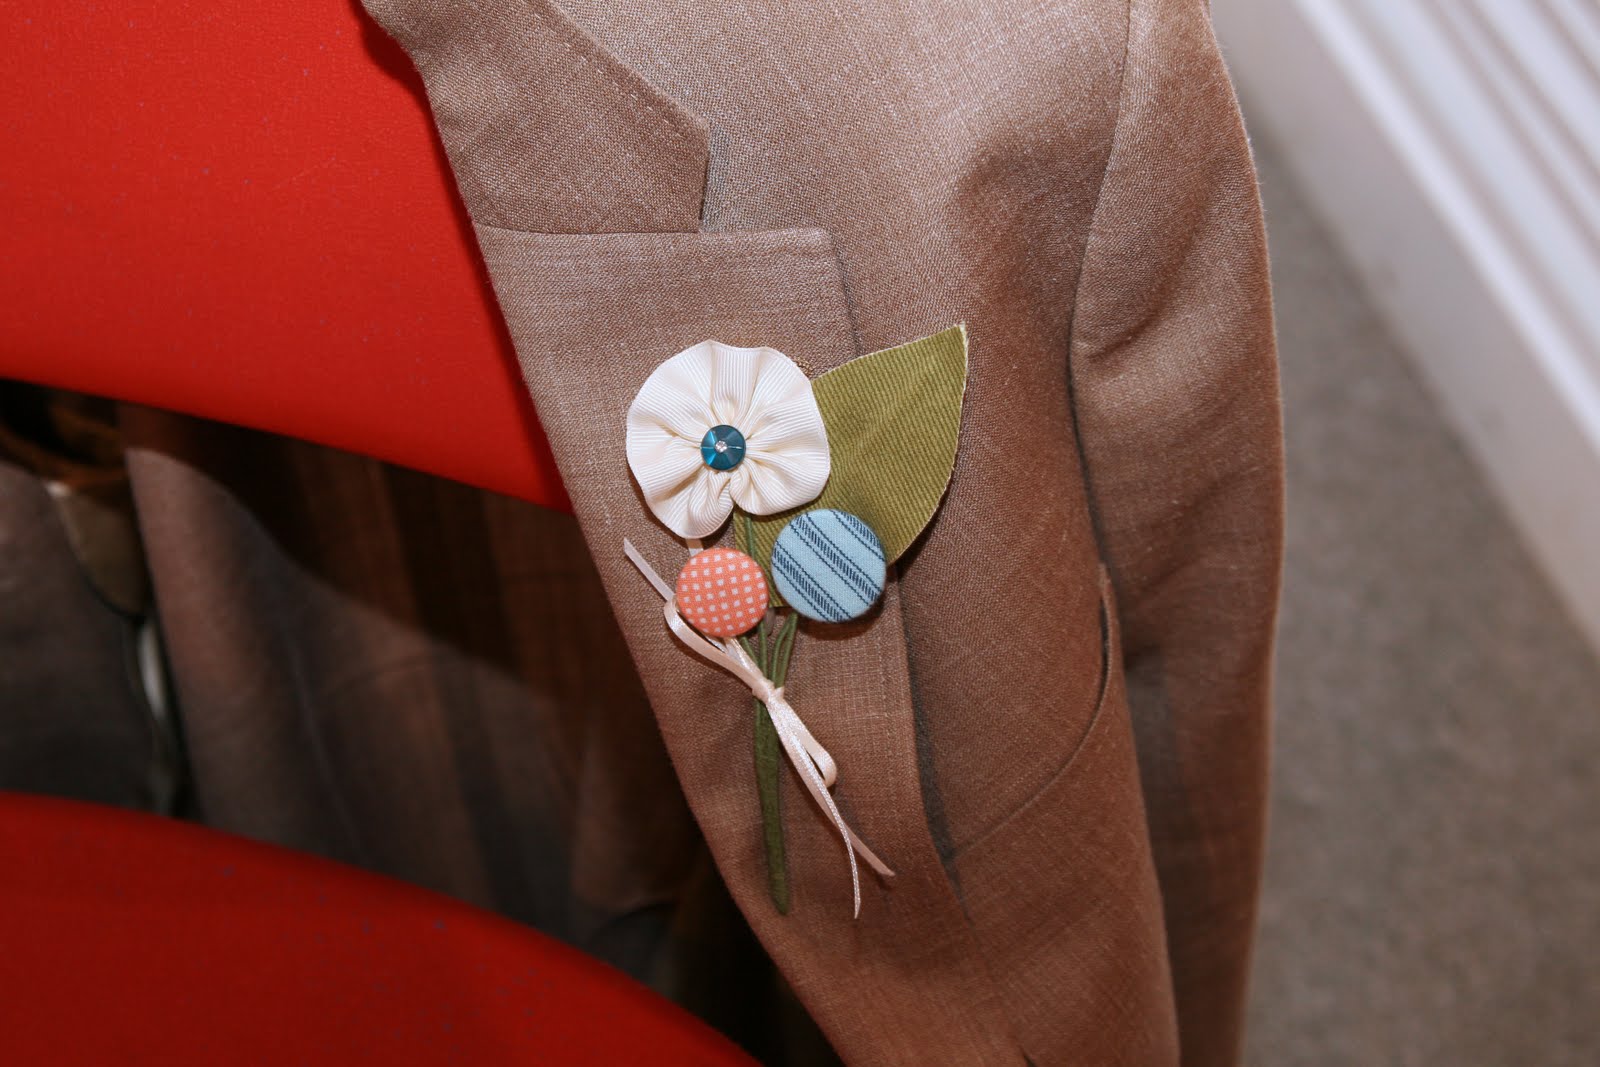
While planning our wedding (aka reading an insane number of wedding blogs), I came across these button blossoms on Martha Stewart Weddings and immediately fell in love with them. I made boutonnieres inspired by Martha's project for my husband and our justice of the peace to wear at our wedding.


I used fabric-covered buttons (this was my first time working with them) and flowers made from ribbon as my "blooms." The leaves were made with fusible interfacing and scrap fabric.

 Photo by Teresa Munisteri 

I really enjoy working with coverable buttons (as seen here) and have plans for cross-stitch pin-back buttons in the coming weeks. Stay tuned!

2.14.2010

happy valentine's day!

 
In preparation for today's holiday, last weekend my husband (he's caught the crafting bug!) and I made a set of valentines from construction paper, doilies, and Elmer's glue using this tutorial from Avie Designs.


The valentines were super easy to make, and I was really happy with how they turned out.


I also used some of the leftover doily scraps to decorate Valentine's Day presents.


To celebrate today, we ate cupcakes from Sugar Mama's Bakeshop--my favorite bakery in town--and chocolate-covered strawberries from the Godiva kiosk in the mall. Did you do anything special for the holiday? 

1.17.2010

crafting in the new year


Lovely embroidery supplies won on September House's blog.

With the new year, comes new crafting projects.  Here's what's currently on my workbench:

>> Little forest quilt by Lovely Design (posted on Purl Bee)

>>Ruffly headband by Heart of Light

And here are some of the other projects on my to-try list:

>>Pom poms by bleubird (I've already made one pom pom from red yarn, and I love it.)

>>Yo-yo wreath by TrueUp

>>Argyle ornament by September House

>>Fabric pom poms from Once Wed

1.10.2010

felt flower brooch

From one of my Christmas crafting sessions with my mom:


a green felt flower brooch.

11.06.2009

austin monthly: the wondercraft


If you're interested in learning a bit more about the Austin craft scene and the recent launch of The Wondercraft, you should check out my article about both in the August 2009 issue of Austin Monthly. Back issues can be ordered here.


10.11.2009

cross-stitch project: kthxbai.


After finishing Tru Luv 4 Eva, I decided to cross-stitch a LOLspeak phrase, and wound up doing one of my favorites (which, according to Urban Dictionary, is usually used when you want to cut someone off and end a conversation): kthxbai.


I found the font online (rather than in my trusty cross-stitch alphabet booklet) and added a navy blue border of my own design around the phrase.


10.08.2009

gift tags


For Christmas, birthday, and just-for-fun presents, I decided to make some gift tags. 


Using an old calendar featuring panoramic views of Big Sur, I got to work tracing an actual tag onto the back of each calendar image. I cut each tag out by hand, and using my trusty three-hole puncher, punched holes into the top of each one.


I have to admit, this project took forever. In hindsight, I probably could have saved time (and avoided hand pain) by purchasing a tag puncher. Maybe next time...


Check out the tags in action here and here.

10.02.2009

cross-stitch project: you're pfun


For my friend's upcoming birthday, I decided to cross-stitch her a simple message, using an alphabet design from my booklet. Since her last name begins with "Pfun," this is what I ended up with:


 And here it is all wrapped up and ready to go: 


9.26.2009

sewing project: tissue holders

As a small thank you to the many people who helped us at our August wedding (by organizing a Sunday brunch, making whoopie pies, and lending me a sewing machine while mine was in the shop), I made lots and lots of tissue holders, using this great tutorial by Skip to my Lou.

It was an excellent project because I was able to use up a lot of scrap fabric and experiment with pattern combinations. I used Japanese fabric for a few of them, but didn't have a chance to photograph those before giving them away.

9.25.2009

cross-stitch project: tru luv 4 eva

A few months ago, I came across an excellent booklet of cross-stitch alphabets at Half Price Books, and it inspired me to try out cross-stitch again (something I did back in middle/high school). Two weeks ago, I finally got around to buying some cross-stitch fabric from a local thrift store for $1, and started experimenting.

First up, something for our house. I chose one of the designs from the book, selected two colors from my decade-old stash of embroidery floss, and stitched up a saying my husband and I like to exchange: tru luv 4 eva.


I framed it in an old wood frame I had lying around, which I painted black.

9.06.2009

sewing project: passport cover


After returning from our trip to Canada (and using my passport for the first time in awhile), I decided I should make a cover for it (I always like a good excuse to sew a simple project). I found this great passport-making tutorial on bunnybum's blog, and here is the result. The blue fabric is the same one I used on the sailor bag, the green ribbon is from Pottery Barn's wedding present gift wrap, and the interior blue ticking is leftover scrap fabric.


8.29.2009

elton's collar

Here's the collar I made for our new puppy, Elton.


Now if only he'd stop moving long enough for me to take a picture of him in it...

8.26.2009

sewing project: the sailor bag


8.16.2009

wedding project: brooch


Using ribbon, pearls, and remnants from my wedding dress's lining, I made this brooch for our ring girl to wear at the ceremony. It was a quick and simple (and last-minute) project and I was happy with how it turned out.

7.26.2009

before and after: wooden boxes

A simple painting project.


From unfinished wood, to painted wood.


These boxes will go on our bathroom shelves and be used for storage.

7.18.2009

sewing project: rebecca cosmetic bag


This is a project that I started and completed a few months ago. I took an old cosmetic bag I had that was falling apart, took the seams out, traced the original fabric, and transferred the pattern onto "new" fabric (the khaki on the exterior is from an old pair of pants).


I used gray and green Amy Butler fabric on the inside and for the exterior strips, and used pink binding tape to hide the zipper's edges.


The zipper is the one from the original bag. I also sewed a "svea" tag to the exterior.

7.14.2009

sewing project: the charlie bag


Though I can't figure out why, this bag, which should have been a quick and easy sew, took me forever. I started it a few months ago, got frustrated and put it aside, and finally got around to finishing it last week, after our move. The pattern is from BurdaStyle, and it's the ubiquitous Charlie bag.


I used some fabric I had lying around and ended up piecing two fabrics together for the outer shell, so that I'd have enough. It's lined (which I was able to do thanks to the second of two tutorials I found on BurdaStyle). I included an inner pocket and a "svea" tag.

7.09.2009

before and after: desk

I'm going to start posting some of the projects I've been working on in the past few months. Tonight I'll start off with a desk I purchased a few months ago. I'd been looking for a desk for awhile, but hadn't had much luck finding anything that was the right size and price, or made from something besides reinforced cardboard. So I was pretty excited to find what I wanted during an afternoon visit to Goodwill. The desk is made from sturdy wood, and has lots of internal storage. The price? A very nice $25.

Before (note the knob missing from the bottom drawer on the left):


After (the black metal knobs are from Home Depot):


Before (note the chipping on the corner; a hunk was also missing from a top corner, but I filled it in with wood filler):


After (check out the desk's gorgeous detailing):


Overall I'm pretty happy with how it turned out, thought the paint is still a bit sticky, which makes worry I didn't give it enough time to dry in between coats (or it could be an effect of this darn Texas weather...).