Showing posts with label mini quilt. Show all posts
3.22.2016
fancy fox II mini quilt
Among the classes I'm teaching this spring at Pintuck & Purl is one on the Fancy Fox II block, a quilt pattern designed by Elizabeth Hartman. Using fabrics selected by the shop's owner, Maggie, I created this fun sample for the class.
This fox is larger than those typically found in the Fancy Fox quilts made from the original pattern (this being one of my favorite iterations of it), so this individual block measures about 20 in. x 20 in., making it the perfect size for a wall quilt.
Since this quilt is destined for the shop's wall, I used Jayne's recent tutorial to make it hangable. I was super pleased with how quick it was to add corner triangles and twill tape tabs to the back for holding a wooden slat, and I love that it's such a clean finish. I highly recommend this method!
I will next be teaching this class in Exeter, NH, this Saturday (March 26), and would love for you to join if you're in the area! You can contact Pintuck & Purl via email or phone to sign up.
Labels:
class,
mini quilt,
pintuck & purl,
wall hanging
9.18.2015
studio tour
We moved into our current house this past May, and I feel like I'm finally settled into my studio enough to share some pictures with you! So I did a bit of straightening up (trust me, it's not always this organized!) and took some photos around the room, if you'd like to see.
The house that we're renting was built in 1898, and my sunny sewing space is on the second floor. It's the largest work space I've had yet, and I've been able set it up in such a way that I can make a quilt from start to finish right here. Whenever I need to baste a quilt, I simply roll up the rug and tape the quilt to the floor.
I have a dedicated wall for photographs, which is where my fabric shelves reside. I added wheels to the Expedit bookcases I keep my fabric in, so whenever I need to photograph something, I simply wheel them out of the way. The flexibility has been so helpful!
My cutting table consists of an Ikea table top with adjustable legs, so I'm able to cut fabrics while standing. I keep a yellow stool from Target nearby, which I use whenever I want to sit and work at the table. Two wall quilts hang next to the table: my Star Blossoms Mini Quilt and the Cross-Stitch Heart Quilt made for me by Alyssa Lichner of Pile O' Fabric.
My design wall (a vinyl tablecloth tacked to the wall with the flannel side out) hangs between the cutting table and my sewing machine. I've hung all of my threads above my machine, along with the hexagon wall quilt I made from Sara Lee Parker's hand-printed fabrics.
One section of the wall features embroidery hoops filled with past projects, including my Hello and Joy samplers, my old shop logos, an embroidered doily design, and a holiday ornament.
I keep finished quilts tucked away in the closet, along with various supplies and WIPs.
I hope you enjoyed this mini tour, and I'd love to hear about where you sew! What's your favorite feature of your space?
Labels:
embroidery,
juki,
mini quilt,
studio,
thread
8.11.2015
teal-and-chartreuse diamond mini quilt
Ever since I received the latest batch of Maze and Vale fabric panels for the shop, I've been itching to sew with the new designs. I'm quite smitten with the trio of prints that are printed on a gray organic cotton base cloth, so I picked this gorgeous teal heart print to use for my first project, and paired it with coordinating teal and chartreuse prints from my stash.
When it came time to figure out what I wanted to make, I almost immediately thought of the yellow-and-white diamond quilt that I posted recently, but actually made quite a while ago. I loved how the pattern worked with solids and almost solids, so I decided to have a go at making another, smaller version, this time using only prints.
I auditioned a few different low-volume fabrics for the background, before settling on my favorite black-and-white polka dot. For the backing, I used a scrap of Marimekko vine fabric (I love the pop of eggplant from that lone bud!).
I used the same method of quilting for this version as I did with the original: white outline quilting in the background, and angled teal quilting lines within each of the diamonds. A pretty diamond pattern emerged on the back as a result.
The teal heart print plays so nicely with the other prints, and I really love the mix of hand-printed and commercially printed fabrics. This quilt is now available in the shop, as are individual panels of the heart print. I would absolutely love to see what you would pair this fabric with in your own projects!
Quilt Stats
Finished dimensions: 16" x 21"
Fabrics used include: LoveHearts in Deep Peacock by Maze and Vale; Firefly Whisper from Hello, Bear by Bonnie Christine; chartreuse prints from Chicopee and Hope Valley by Denyse Schmidt; and teal prints from Botanics and Doe by Carolyn Friedlander.
Block tutorial: Half-Rectangle Triangle by Latifah Saafir for the Modern Quilt Guild
Labels:
denyse schmidt,
diamonds,
mini quilt,
wall hanging
8.06.2015
cultivate blog tour + a new wall quilt
Good morning! Welcome to my stop on the Cultivate Blog Tour, a blog hop celebrating Bonnie Christine's latest fabric collection, Cultivate. I've sewn with Bonnie's fabric and ribbon before (using them in both a lined tote bag and a round zipper pouch), and I must say that the colors and patterns in this latest collection are among my favorites.
In case it's your first time here, welcome! My name is Caitlin, and I'm a full-time quilter working out of my studio in southern New Hampshire. In addition to selling quilts and patchwork goods in my online shop, I also stock hard-to-find and exclusive screen-printed fabrics from indie designers. You can find me on Instagram and keep up with shop news by signing up for my newsletter.
Now on to the project: I knew that I wanted to make a wall quilt with the four fat quarters from Cultivate that I selected, but it wasn't until Sunday when inspiration for a quilt design struck. While selling quilts at an outdoor craft show in Boston, I spotted this geometric tea towel by Cat Wagon Prints in the booth across the way. I was immediately drawn to the design, so I purchased a towel and started sketching out ideas on how to translate the shapes into a quilted piece.
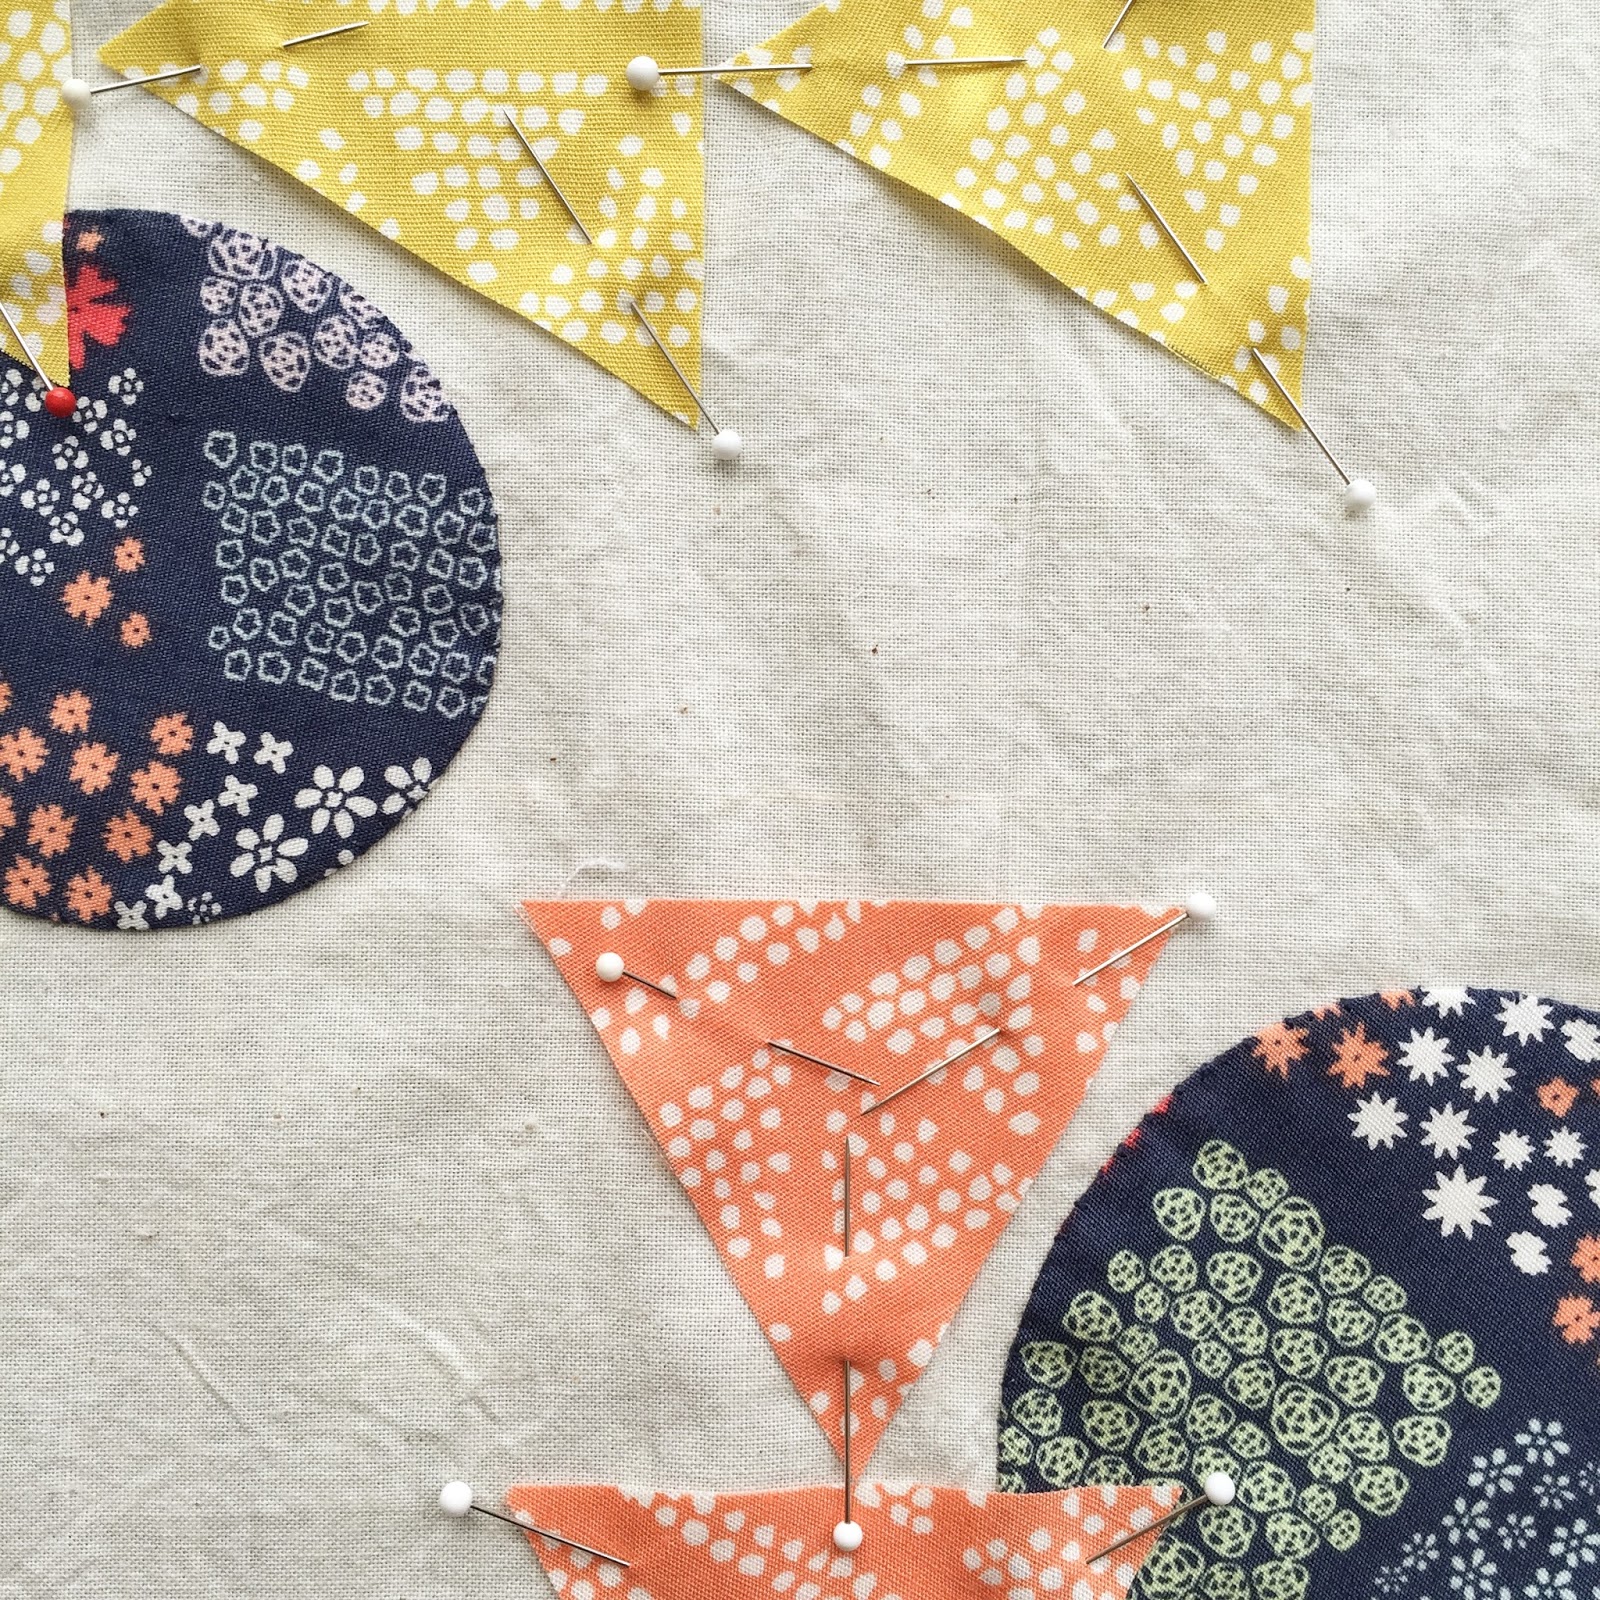
When it came time to start constructing the top, I decided to use needle-turn appliqué in lieu of traditional piecing, since it would allow me to more easily layer the shapes on top of one another. I cut out circles from the navy blue floral---the print that initially drew me to the collection---and thread basted and then sewed the circles to a piece of unbleached muslin.
Once those were stitched down, I started on the pink and chartreuse/yellow triangles. I initially started with half-square triangles, like those in the original tea towel, but almost immediately gave up on that shape when it came time to turn under the acute angle corners---my needle-turn appliqué skills are not there quite yet! So instead, I cut out equilateral triangles and arranged them across the top, stitching them down and practicing and perfecting my angles as I went.
Once everything was hand-stitched, I machine quilted over all of the shapes with my favorite grid design in natural-colored thread, and then machine bound the quilt with a pink and white stripe from the collection.
This turned out to be such a fun experiment in quilt design, and though the hand appliqué process was definitely time intensive, I think the results were well worth it.
Would you like to see some more projects using Cultivate fabrics? Be sure to check out the onesies Bonnie made out of knit for the little girl she's expecting this month (!), the knit tops her mom made, and the project Sandy from Crafty Planner will be posting tomorrow. And in the meantime, you can now find this quilt listed for sale in the shop.
Quilt Stats
Finished dimensions: 20.5" x 21.5"
Fabrics used: Unbleached muslin; Plotted Farm in Autumn and Moss, Floriculture in Midnight, and Row by Row in Lit, all from the Cultivate collection by Bonnie Christine.
Quilt design: Original by Salty Oat
Labels:
applique,
blog tour,
mini quilt,
triangle,
wall hanging
7.23.2015
hourglass mini quilt
When I first spotted this Amish hourglass quilt from the Esprit Quilt Collection on Pinterest six months ago, I was immediately smitten. I returned to the image over and over again, so when I was in between projects a few weeks ago, I decided to finally create a mini interpretation of the original.
The quilt's size was dictated by the amount of dark charcoal gray fabric I had in my stash (which first appeared in this gingham quilt I made in 2012), and as a result, the small top came together quickly---a very satisfying finish! I backed the quilt with a colorful Lizzy House print I picked up from Grey's Fabric in Boston, and machine bound it with subtly patterned gray print by Carolyn Friedlander.
Inspired, I've returned to reading my copy of Amish Quilts by Janneken Smucker, wanting to learn more about the history of quilts within the Amish community. I'm also very excited to explore this particular quilt design more, and have plans for larger versions in other colors.
This quilt is now available in the shop.
Quilt Stats
Finished dimensions: 18" x 18"
Fabrics used include: Striped Etching in Ash from Botanics by Carolyn Friedlander; Cat Dream in White from Catnap by Lizzy House.
Quilt design: Based on an hourglass Amish quilt from the Esprit Quilt Collection
Labels:
amish,
lizzy house,
mini quilt,
quilt,
solids,
wall hanging
6.18.2015
embroidered heart mini quilt
This mini quilt started out as a simple embroidered heart, which I stitched for a class that I taught a few years ago. While I often frame my finished embroidered pieces in either hoops or on stretcher bars, I wanted to take a different approach for this piece.
I pulled a number of solid pink and red fabric strips to coordinate with the monochromatic satin stitching I'd done to fill the heart. Keeping the heart as the center, I built a small log cabin quilt top. As I approached the outer rings, I incorporated strips of Umbrella Prints' Hearts in Cherry Blossom fabric, which seemed rather fitting.
When it came time to quilt it, I opted for dense, straight-line quilting in pink thread, something I typically reserve for smaller pieces due to its time-consuming nature.
I used the same Hearts in Cherry Blossom fabric on the back, which shows off the quilting and the fun texture it creates.
The heart was stitched from this digitally printed pattern I designed, which can be purchased from Spoonflower, if you're interested in stitching your own. One heart fits on a swatch and can easily be framed in a 6" embroidery hoop---or with any other method you can dream up!
And if you're interested in the mini quilt itself, it's now available for purchase in my Etsy shop.
Labels:
embroidery,
etsy,
heart,
mini quilt,
spoonflower,
wall hanging
7.08.2013
architextures mini quilt
Do you ever fall in love with a fabric line and want to use it in all of your projects? That's how I feel about Carolyn Friedlander's Architextures line, which I first saw at Quilt Market last fall. I snagged a little mini pack (2.5" squares) of the line while I was there, and finally turned it into a small quilt last month.
The top was entirely paper pieced by hand, some of which I did while traveling to and from Quilt Market in Portland in May.
While at Market, I actually had the opportunity to meet Carolyn, who was incredibly nice and had an amazing booth.
I used chambray squares between each of the octagons, and backed the quilt with a vintage reproduction floral print.
I absolutely adore this quilt---now I just need to figure out where to put it!
What are your favorite fabric lines? In addition to Carolyn's work, I really love Leah Duncan's designs, and can't wait to get some yardage of her new line, which will be released next month.
Labels:
english paper piecing,
mini quilt,
quilt market
6.16.2013
mini quilts for the alzheimer's art quilt initiative
The Alzheimer's Art Quilt Initiative (AAQI) is one of my favorite charities to support. The work they do to raise money for Alzheimer's research is amazing, and I have my own growing collection of quilts that I've purchased from their site over the past year and a half. I've been wanting to donate quilts to AAQI for quite some time, and last month I finally did.
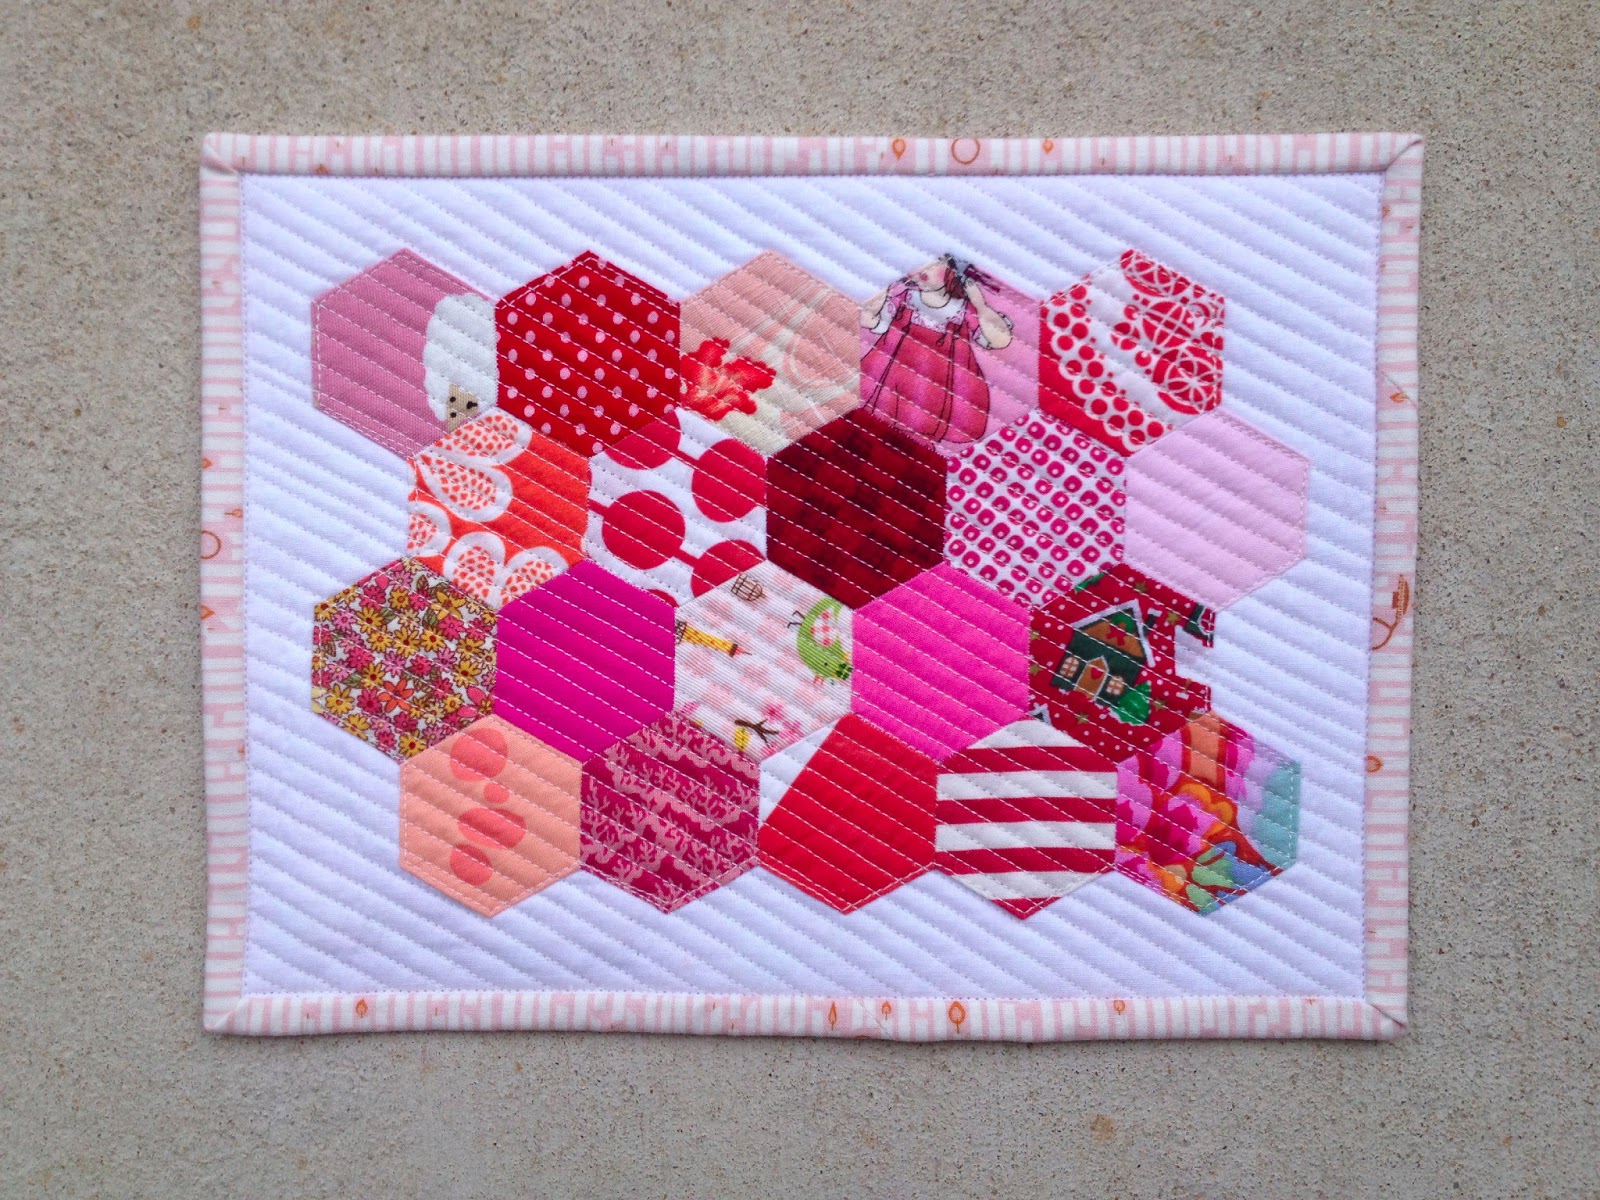
I made two mini quilts---each one is about 9" x 11"---from scraps in my stash. For each quilt, I hand-stitched monochromatic hexagons together, and
then machine appliqued them to the background. I did dense straight-line
quilting on each and machine bound them (my first time!).
Both quilts are now for sale on the AAQI web site, here and here, and all proceeds from their sale go toward Alzheimer's research. If you have the chance, I definitely recommend taking the time to browse the Quilts for Sale page, as there are a lot of really beautiful quilts on there, made by many talented quilters.
P.S. Happy Father's Day to my dad, to whom both of these quilts are dedicated.
Labels:
alzheimer's,
charity,
english paper piecing,
hexagons,
mini quilt
Subscribe to:
Posts (Atom)