Showing posts with label bags. Show all posts
5.28.2013
2013 umbrella prints trimmings competition
These days, I'm pretty much smitten with screen-printed fabrics. I love the look of one and two-color prints and I love being able to support independent designers who produce their work by hand. One of my goals for the year is to incorporate more screen-printed fabric into my work, so when I saw the posting for this year's Umbrella Prints Trimmings Competition, I decided to enter for the second year in a row (you can see my entry from last year here). I love Umbrella Prints' screen-printed fabric, and this competition is such a great motivator for me to cut into fabric I typically hoard.
I mulled over my options of what to do for weeks, and this past weekend I finally decided to make something from my growing to-make list: a drawstring bag using Jeni's tutorial.
For the front, I scaled down Faith's Greek Cross block from the Summer Sampler series and made a mini quilt block.
I sewed the remaining scraps together at random to create a panel for the back, and used chambray for the remaining panels.
I lined it with a Denyse Schmidt print that complemented the Umbrella Prints' fabric in both style and color, and used up some leftover Kei Honeycomb Dot binding (originally made for this quilt) for the drawstrings.
Voting for the competition starts Saturday and runs through June 5. To vote, simply pin all of your favorite entries over here.
Will you be entering the contest this year? If so, please share a link to your entry in the comments; I'd love to see!
P.S. You can see some of my photos from the recent Portland Quilt Market over on Instagram! You can find me there under the username @saltyoat.
Labels:
bags,
scraps,
screen-printed fabric,
umbrella prints
1.14.2013
metal frame clutch
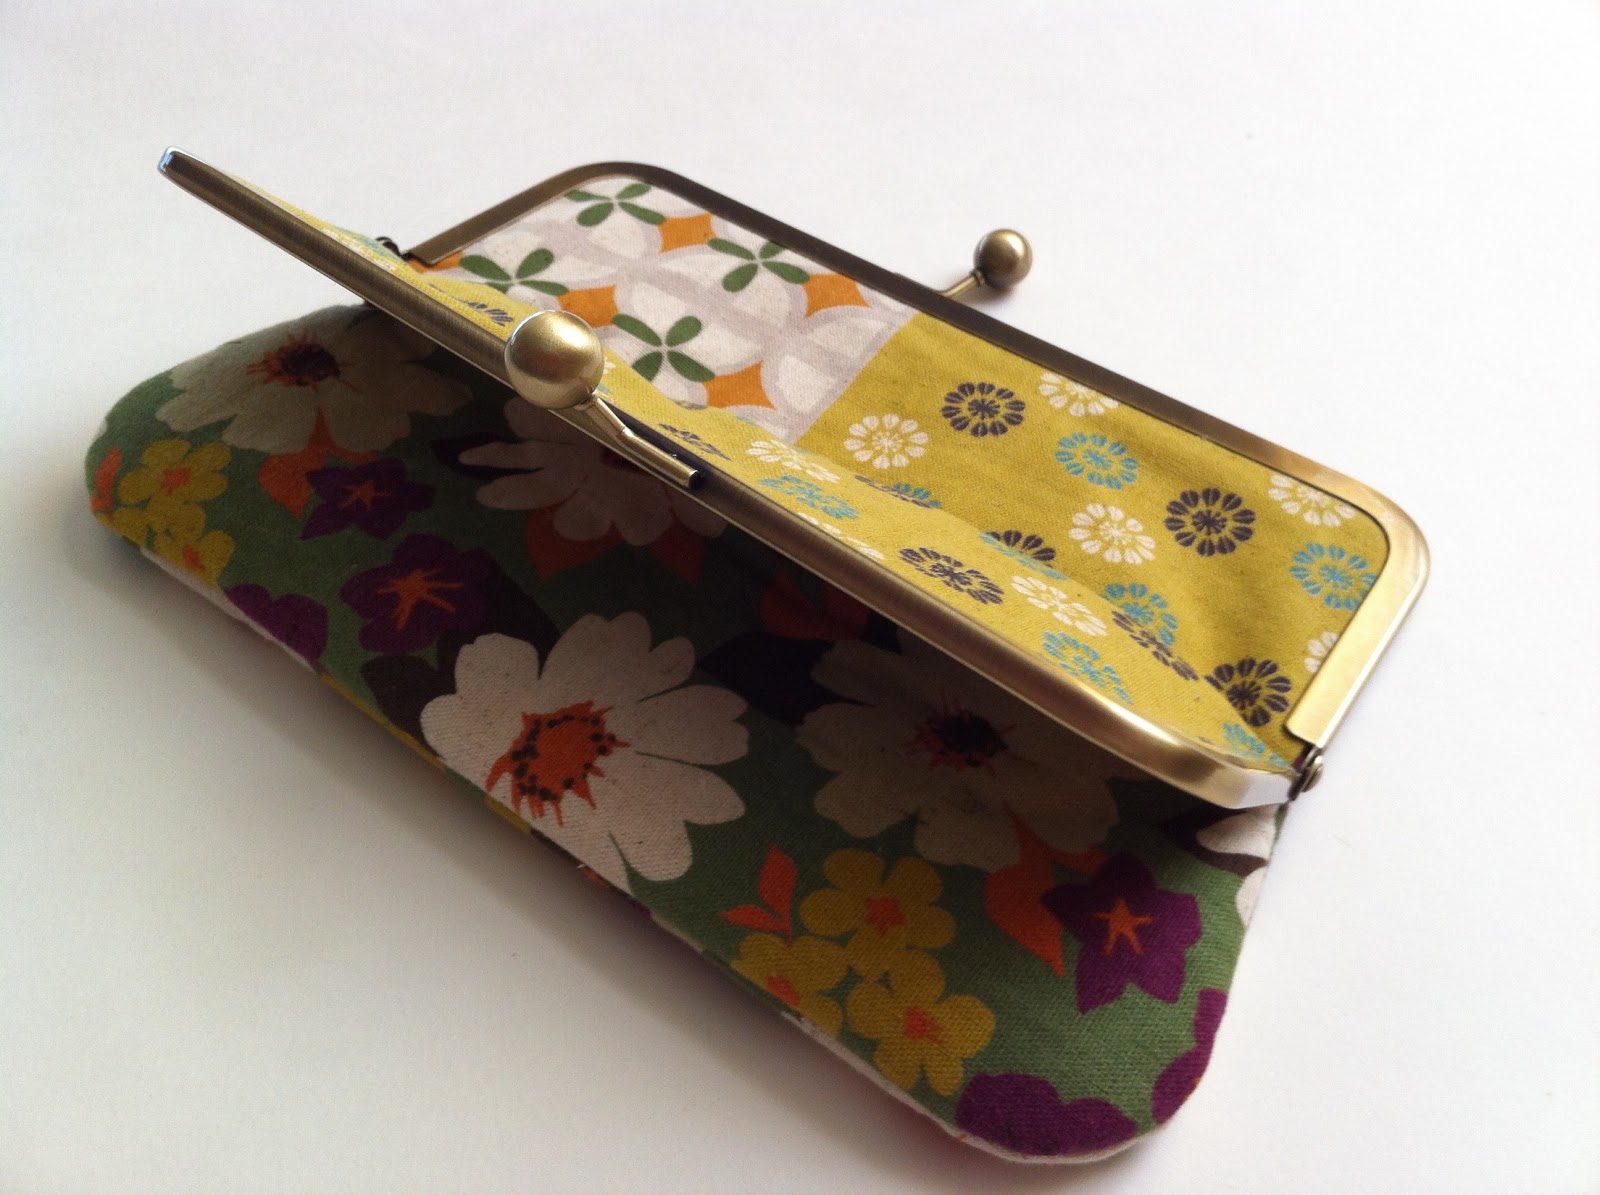
I've always loved the look of metal frame clutches, but was always too intimidated to learn how to make one (I tend to veer away from any project that involve fabric glue for fear of making a mistake and winding up with glue on everything). So when I heard that Kelly would be teaching a metal frame clutch class at Sewing Summit, back in October, I jumped at the chance to learn something new.
The clutch was relatively simple to construct, and I used Melody Miller fabric I had leftover from my log cabin napkins for both the outside and the lining.
Kelly helped me during the gluing stage, which turned out to be not so scary or messy, and I thought the end result was very cute.
This year, I hope to continue tackling sewing projects with new, sometimes intimidating, techniques. How about you? Are there any techniques you're hoping to learn?
9.26.2012
leather + canvas foldover clutch
Since I'll be traveling a lot this fall (Salt Lake City, Austin, New York and DC are on the list!), I wanted to make myself a cute clutch for nights out on the town. Inspired by the tutorials I've seen floating around blogs, I decided to make myself a foldover clutch with a metal zipper using a combination of these two tutorials.
Thanks to an afternoon sewing session with a friend, I managed to start and finish the clutch in a day. I used black and white fabric from Ikea (look familiar?) and leather from another friend for the outside of the clutch.
And for the inside, I used a print from Erin McMorris's Summersault line, which I picked up from Sew Mama Sew! last year.
For someone with no zipper experience, this was an easy project with super polished results. I can't wait to use it during my travels!
P.S. We're almost halfway to our fundraising goal for the Walk to End Alzheimer's in October, and I'm sending handmade cross-stitch buttons to everyone that donates! Details here.
10.28.2010
christmas wish list
In case you were wondering (you were, right?), here's what's topping my Christmas wish list this year:
Zipper Purse by Made by Hank
Labels:
bags,
books,
christmas gift,
embroidery,
my wish list,
tote bag,
zipper pouch
7.01.2010
sewing project: fern-stitch napkins + train tote
For my sister-in-law's June birthday, I sent her a package filled with cupcake-making supplies and some handmade goodies, including a set of four hand-embroidered napkins with a fern-stitch border. (I sold a teal pair in my shop not too long ago.)
I wrapped everything up in a little tote I made a few years ago from some amazing train fabric found in my mom's stash.
The tote was lined with pink polka dot fabric, which was also used for the handles, and I sewed coordinating green buttons at the base of each of the handles.
6.24.2010
sewing project: bias tape bag
On Tuesday night, I came across this tutorial for a bias tape bag on Prudent Baby, and decided to try it out.
In under two hours, I had an adorable, reversible bag. I used recently thrifted polka dot fabric for one side, and Japanese fabric featuring sheep for the other. The light blue bias tape is handmade and leftover from the quilt that I made for my parents for Christmas.
I was hoping to use the bag as a new lunch tote, but sadly, it was too shallow for my needs. (I seem to have a history of making too-small lunch bags.) I may attempt to make another, deeper one soon.
2.09.2010
12.10.2009
12.07.2009
lunch tote giveaway winner!
Thank you so, so much to everyone who entered the giveaway! I was blown away by the number of responses and I loved reading each and every comment.
Without further adieu, the winner of the lunch tote and napkin is:
Congratulations, Laura! I'll be in touch to get your address and I'll mail your package this week.
And in case anyone is interested in purchasing their own lunch tote, feel free to drop me a line (by leaving a comment on this post). I have extra fabric (and another one of those red buttons!) and would be happy to recreate it.
Labels:
bags,
free stuff,
giveaway,
napkins,
sewing
11.22.2009
sewing project: lunch tote
I recently checked Amy Karol's Bend-the-Rules Sewing out from the library for the pillowcase swap that I'm participating in. One of the many simple patterns in the book is for a lunch tote, and since Elton (the crazy puppy) recently chewed through the straps of my current lunch bag, I thought it'd be a useful pattern to try out.
The pattern was pretty straightforward (though the book did list the wrong measurements for the handles, which I was luckily able to catch before cutting). The bag features two handles, one long and one short, that can be looped through one another.
The interior and back of the bag are the same charcoal gray canvas-like material (a thrift store find) I used on the handles, and a small pocket, made of the blue ticking, is on the inside. I added a red plastic button (another thrift store find) to the outside of the tote.
Overall, I think the tote turned out nicely; however, I should have checked the pattern's measurements before I started sewing. It turns out the tote can't fit more than one Tupperware container, and adding a piece of fruit to the mix is really pushing it. It looks like I'll have to give lunch-bag making another go.
9.10.2009
clutch by jenny n. design
Check out the amazing clutch that I just found out I won!

It's made from vintage mint leather and is by jenny n. design, a great local bag designer. I can't wait to see it in person!

It's made from vintage mint leather and is by jenny n. design, a great local bag designer. I can't wait to see it in person!
8.26.2009
7.18.2009
sewing project: rebecca cosmetic bag
This is a project that I started and completed a few months ago. I took an old cosmetic bag I had that was falling apart, took the seams out, traced the original fabric, and transferred the pattern onto "new" fabric (the khaki on the exterior is from an old pair of pants).
I used gray and green Amy Butler fabric on the inside and for the exterior strips, and used pink binding tape to hide the zipper's edges.
The zipper is the one from the original bag. I also sewed a "svea" tag to the exterior.
7.14.2009
sewing project: the charlie bag
Though I can't figure out why, this bag, which should have been a quick and easy sew, took me forever. I started it a few months ago, got frustrated and put it aside, and finally got around to finishing it last week, after our move. The pattern is from BurdaStyle, and it's the ubiquitous Charlie bag.
I used some fabric I had lying around and ended up piecing two fabrics together for the outer shell, so that I'd have enough. It's lined (which I was able to do thanks to the second of two tutorials I found on BurdaStyle). I included an inner pocket and a "svea" tag.
6.26.2009
Subscribe to:
Posts (Atom)